
Fair Value Gaps and Order Blocks are everywhere on a chart — the skill is knowing which ones the market will respect. FVG + OB Hunter does the heavy lifting: it finds every zone the moment it forms, grades it by strength, and tells you when price comes back to test it.
Here is exactly how to use it — from reading a graded zone to timing the entry — so you trade the structure that holds and leave the noise alone.
First, What the Hunter Is Looking For
Two structures carry most of the edge in Smart Money trading:
- An Order Block is the last opposing candle before a strong, decisive move — the footprint of where large orders were filled. Price often returns to that zone to rebalance before continuing.
- A Fair Value Gap is the imbalance left behind when price moves so fast it skips a level. The market tends to revisit that gap to fill it.
Both give you a precise, mechanical zone — not a guess. The catch is that drawing them by hand is slow, and not every zone is worth trading. That is the gap the Hunter closes. New to the concept? Start with our explainer on how Fair Value Gaps actually work.
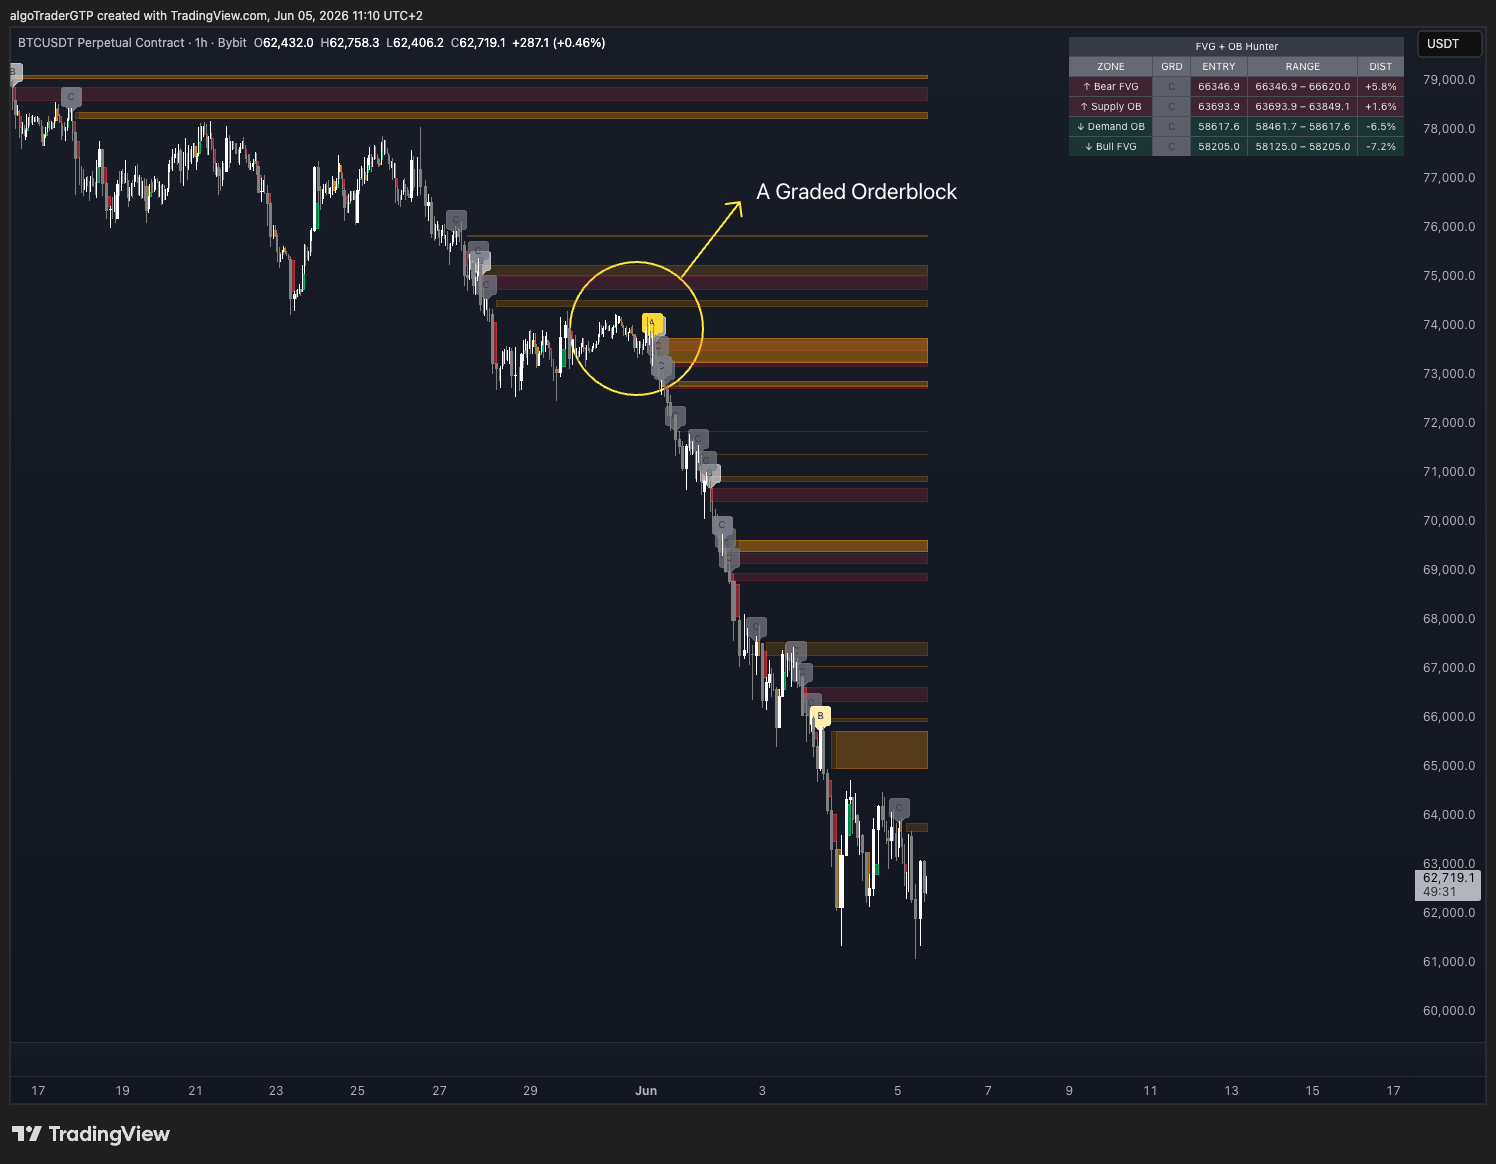
Step 1 — Read the Grade, Not Just the Box
Most tools draw a box and stop there. FVG + OB Hunter grades each zone by strength, so an A-grade order block stands out from a weak one at a glance. The grade is your filter: the higher it is, the more decisive the move that created the zone — and the more likely price respects it on the retest.
It also keeps a live summary of the nearest zones, so you always know which level is in play above and below current price without scrolling the chart.
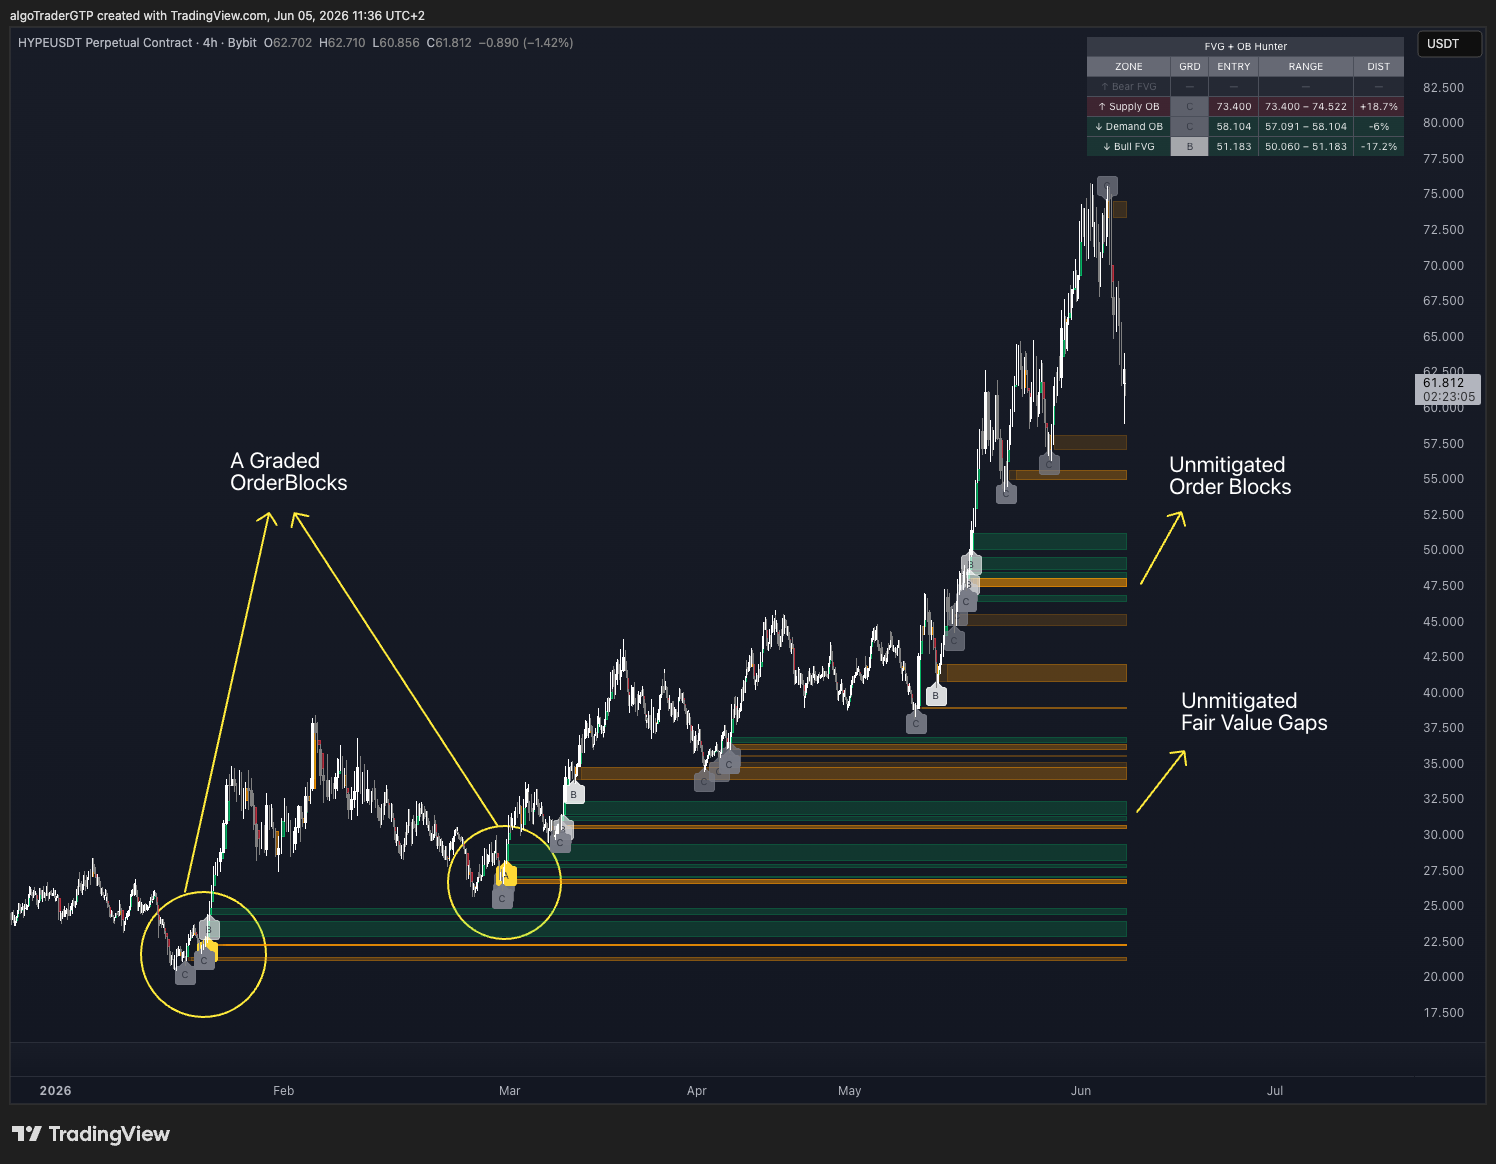
Step 2 — Stack Confluence Across Timeframes
A zone is stronger when more than one structure lines up at the same price. The Hunter marks Order Blocks and unmitigated Fair Value Gaps together, across timeframes — so when a higher-timeframe order block overlaps a fresh FVG, you can see that confluence stacking in one view. Those overlaps are where the desk pays the most attention.
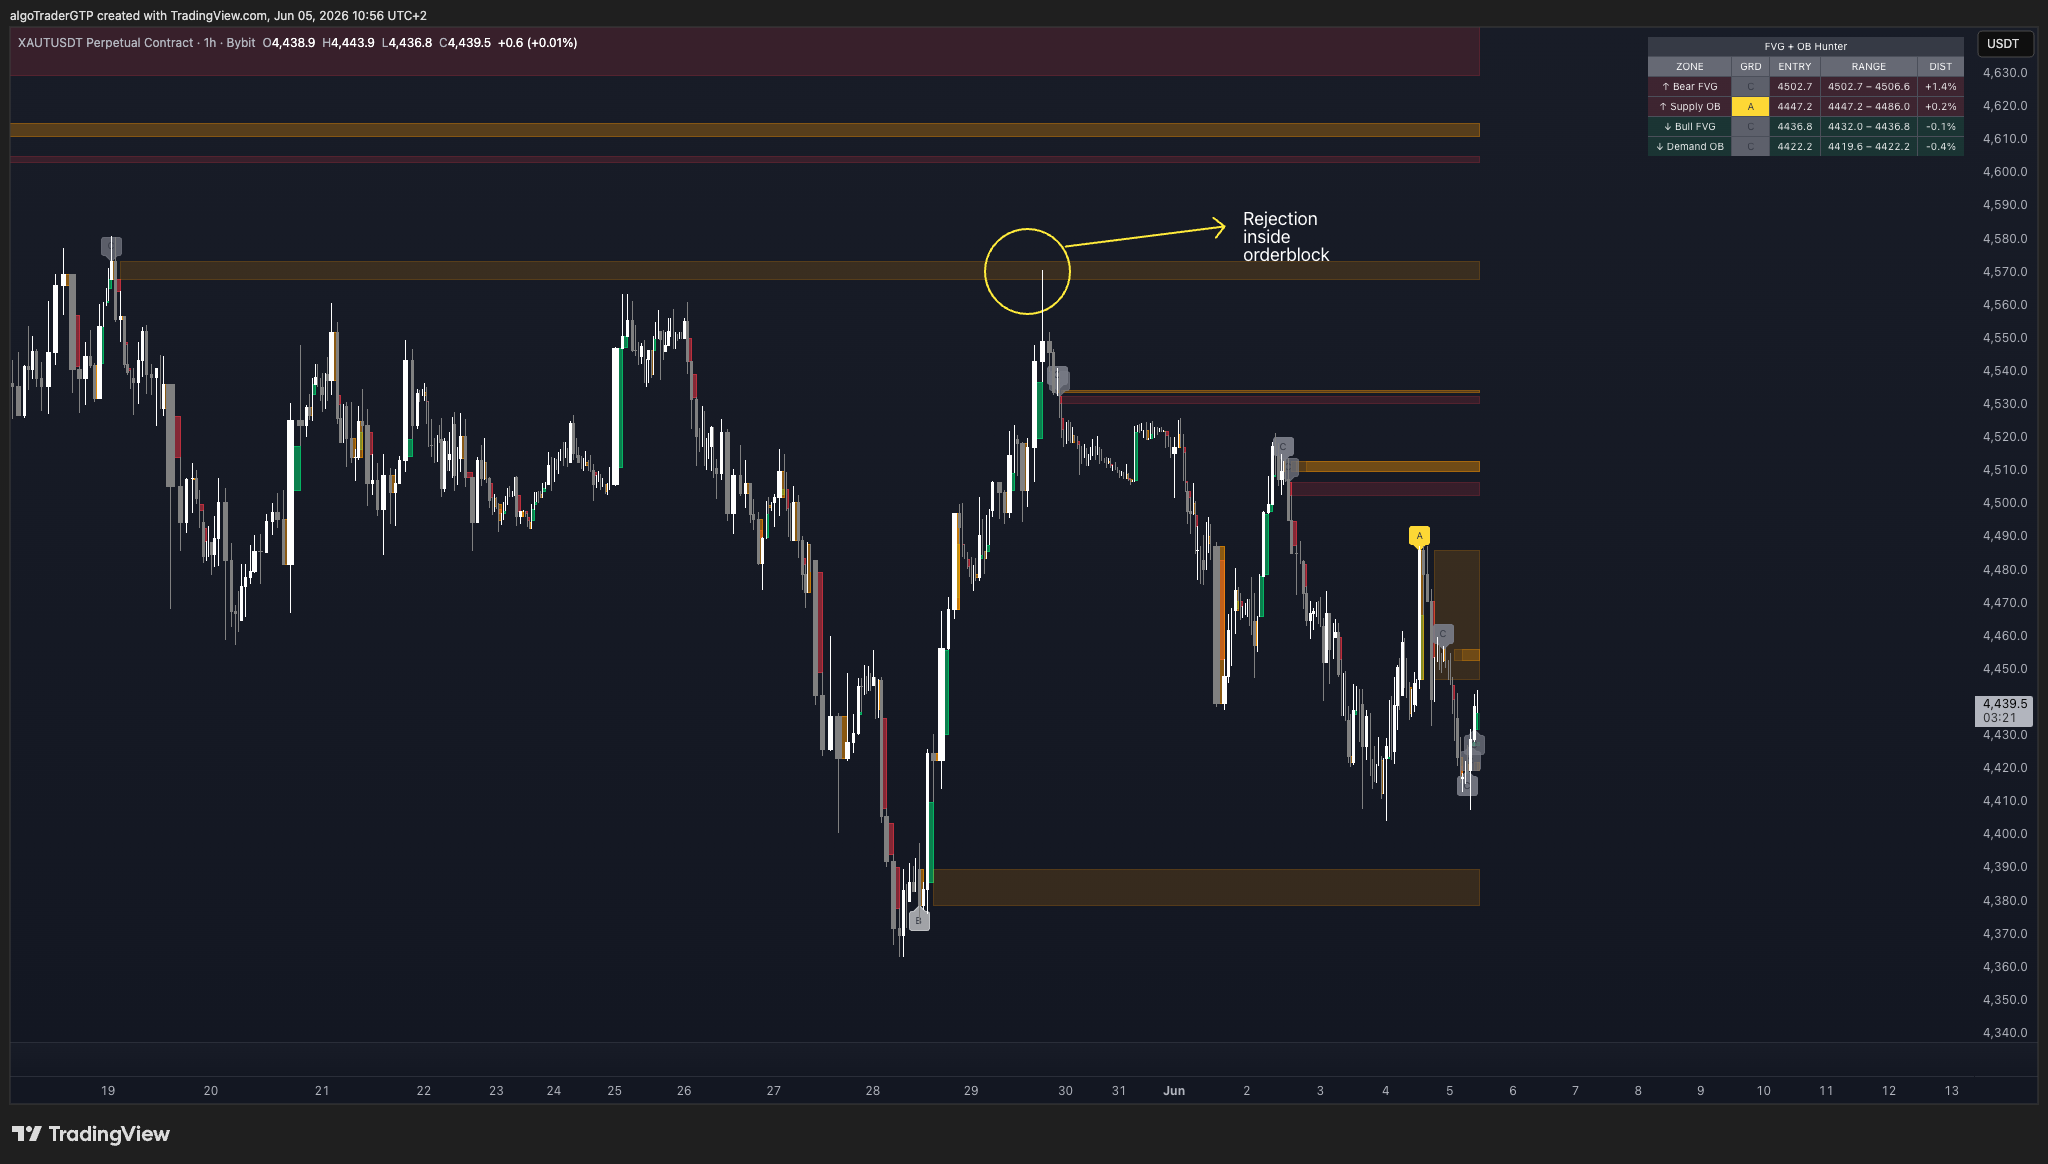
Step 3 — The Entry Playbook
- Wait for the retest. Don't chase the move that creates the zone — let price come back to the graded block or gap.
- Favor the high grades. Use the strongest zones as your primary setups and treat weak ones as context, not triggers.
- Look for confluence — a retest into a zone where an order block and a fair value gap overlap is far stronger than either alone.
- Enter on the reaction, stop beyond the zone. Your invalidation is structural: if price closes cleanly through the block, the idea is wrong — and you're out small, by plan, not by panic.
The same logic works on any asset and any timeframe, because order blocks and gaps are a property of how price moves — not of one specific market.
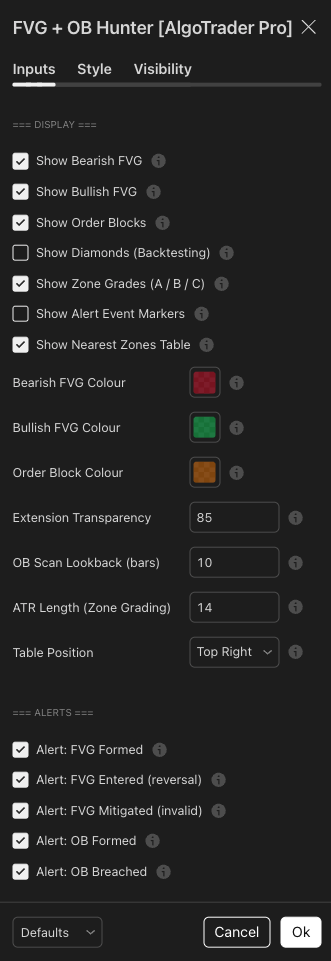
Step 4 — Set the Alerts and Walk Away
You don't have to babysit the chart. FVG + OB Hunter has five independent alert types — so it can ping you the moment price returns to a zone, instead of you watching it form. Every input has a tooltip, so you can tune grading sensitivity, colors, and which alerts fire without guessing.
This is educational, not financial advice. Zone grades describe structure strength — they are not predictions, and no setup wins every time. Manage risk and size positions accordingly.
Get FVG + OB Hunter
FVG + OB Hunter is a one-time purchase that runs on TradingView — it detects every order block and fair value gap as it forms, grades each one, and alerts you on the retest.
Don't want to chart it yourself? Our desk runs this exact methodology live, every session, through the AlgoTraderPro signal service. See how the signals work.
Trade the zones that hold — let the grade show you which ones to wait for. Disclosure: some links above are affiliate or product links — if you buy through them, AlgoTraderPro may earn a commission at no extra cost to you.